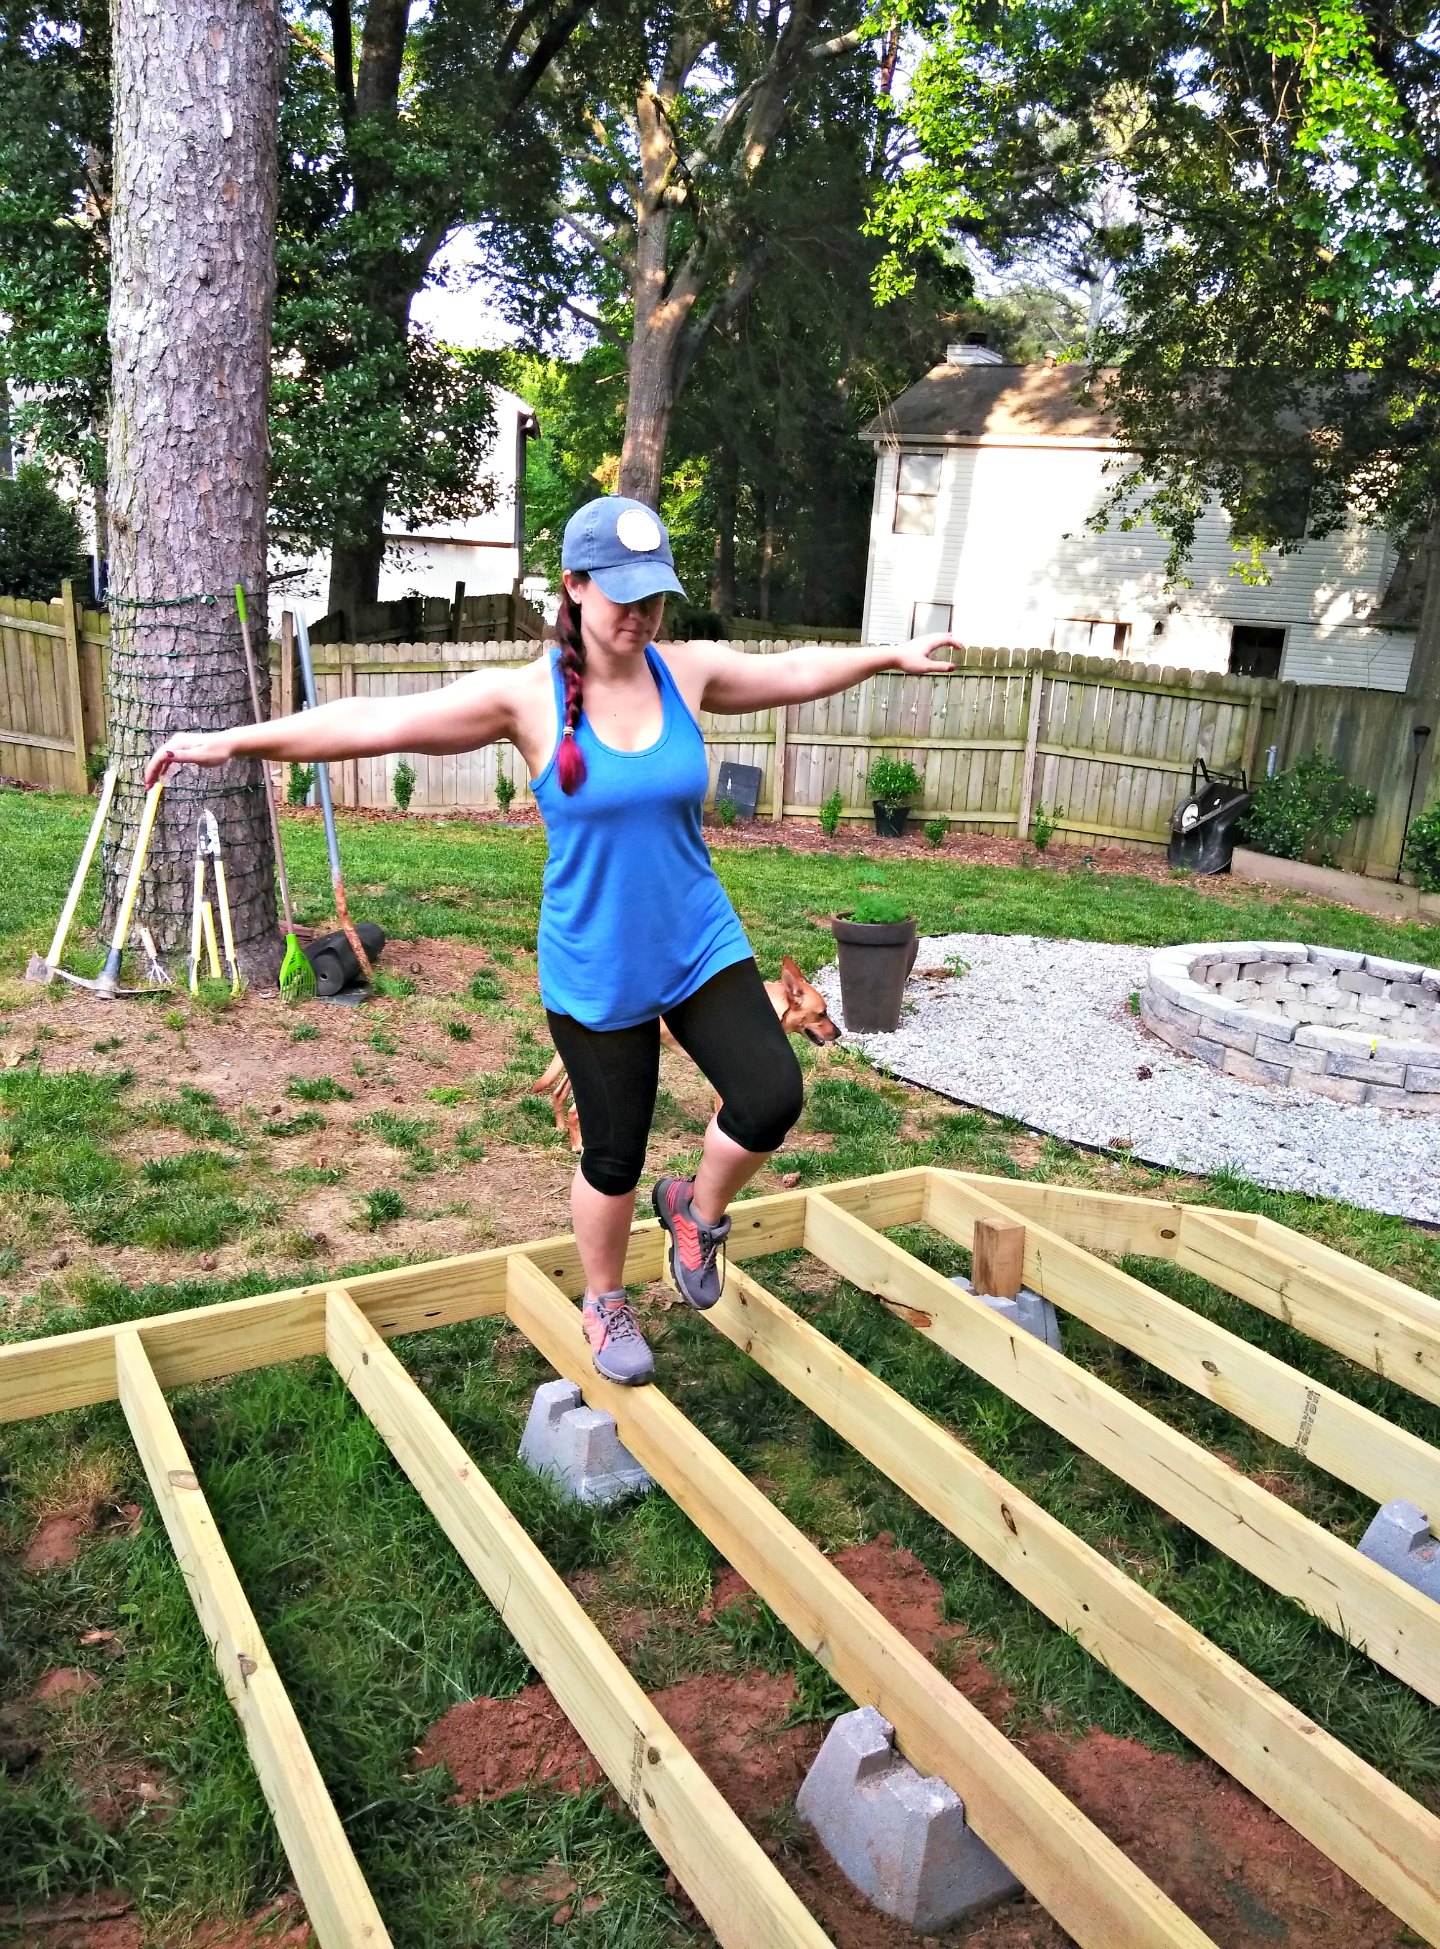
Hey there! This post (or post series, rather) has been a long time coming. I’ve gotten started on my new floating deck (also sometimes called a freestanding deck), and I’m so excited to see this one finished! I want to first walk you through some of the decision-making details before I jump into the build. So, this post is going to cover a lot of topics regarding research, budgeting, and design.
With that in mind, bear with me as we go through. My main goal is to help clear the fog on the where/what/why, and a lot of these decisions are unique challenges of my yard (sloping, building over/around a concrete patio, etc.). If you wind up having questions as I go, I’ll try address them in future posts!
BACKYARD UPGRADES (TO GET TO THIS POINT)
If you’ve been following along for a while, then you already know a lot of this. But for those that don’t, for the longest time with this house, I’ve been focusing a lot on the interior. I supposed that’s a pretty normal habit. We are more likely to first change the things we interact with everyday, like the kitchen, before we start fixing the part that can be more easily ignored, like the overgrown bushes in the back yard.
Each year, I dedicated a little time toward making progress. Baby steps! I killed off ivy, removed a bunch of pine trees, and filled in a sinkhole. Eventually, I made cosmetic improvements (a back hedge, fire pit, corner garden, etc.). All of a sudden, late last year, things really started to click; it was time to begin the two big projects I’ve always wanted to do. As with any project, it was a matter of money, time, labor, and research. It can all seem pretty overwhelming until you get started, and I am VERY good at procrastinating when I have a lot of logical reasons to postpone at my disposal!
TIMING AND BUDGETING: A JUGGLING ACT
I knew I wanted to build a shed for extra storage toward the back of my lot and began planning for that last summer (which is also underway, but that build has its own separate series). I also wanted to eventually build a floating deck off of the existing concrete slab next to the house.
Originally, I thought these projects would happen in completely different timelines. But as I was planning, I managed to bring a sponsor onboard for the shed. That was a huge thing for me, since this has so many moving parts with weather/budget/etc. So, a huge thank-you to Wood Its Real for that help! I realized that, since I had been saving up for the shed and could redistribute that budget, I could basically maximize cost savings if I did both projects in one short, blazing summer of building. A lot of materials crossed over between the builds, so I could also use the new skills from one build to the next while it was still fresh in my mind. Then, I sketched up a quick version of how I thought everything would be done.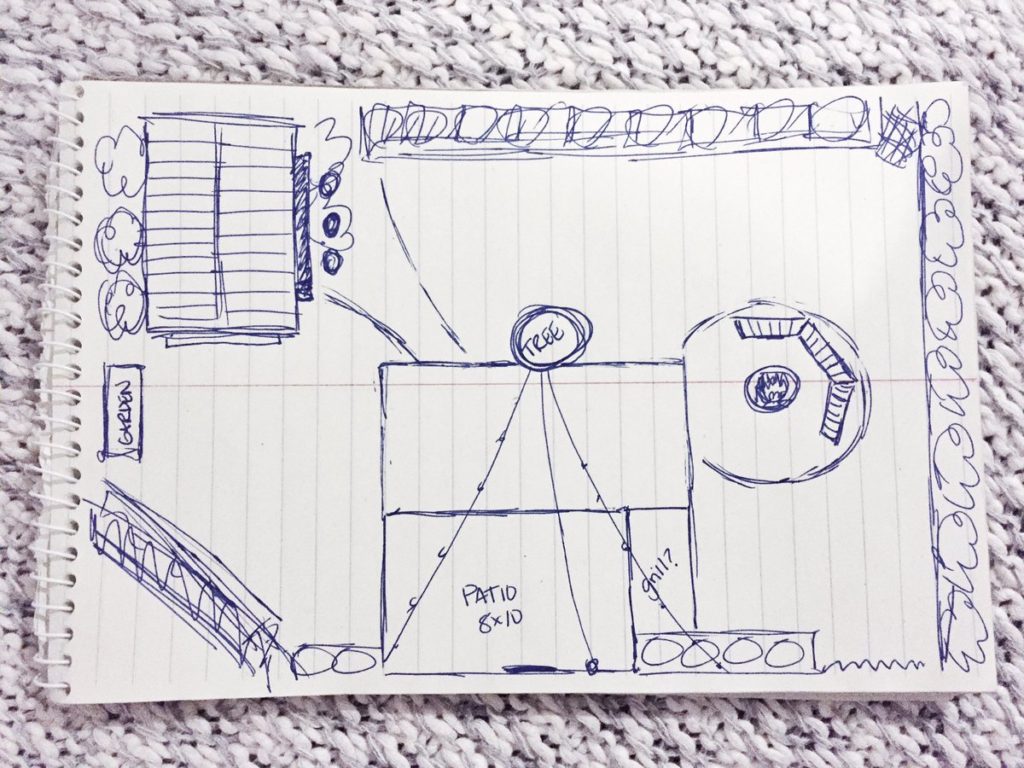
This seemed like a great option if I could also somehow convince K to help me design and plan it. It would be well worth the effort, I reasoned, provided that we didn’t manage to kill each other with all the sharp power tools at our disposal (thankfully, he’s a design engineer professionally and likes power tools as much as I do, so it was an easy sell). But to do any of it, we needed an actual, proper plan.
DESIGN
I wanted the new build to create a natural flow from the patio door to the deck, from the deck to the fire pit, and so on. This would maximize the yard for an open, entertaining feel, while still giving everything separate zones.
- Patio = grill spot
- New deck = seating area
- Fire pit = fire pit shenanigans